Jeep Wrangler 2018-2025 Owners Manual / SERVICING AND MAINTENANCE / INTERIORS / Carpet Removal / Front Carpets (Two And Four Door Models):
Jeep Wrangler: Carpet Removal / Front Carpets (Two And Four Door Models):
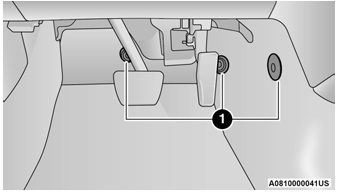
- Remove the front grommets.

Front Carpet
- Grommets
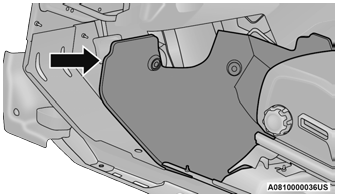
- Pull the carpet out from the front to the rear.

Front Carpet Pulled Away
- Remove the grommets under the front seat.
First for the rear carpet and then the front
carpet.

Front And Rear Carpet Split
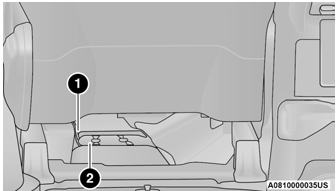
- Under the back of the front seat, open the
carpet split and then pull out the rear edge
and slide the carpet to the front (do not
remove the harness).

Rear Underside Of Front Seat
- Harness
- Carpet Split
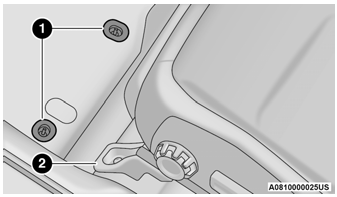
- Finally open the carpet split around seat
bracket and then remove the last two
grommets.

Front Seat And Floor
- Grommets
- Carpet Split
- When reinstalling carpet please perform these steps in reverse order making sure that the carpet is tucked under the scuffs, B-pillar, console, and refasten grommets.
 Rear Carpet (Four Door Models)
Remove the grommets under the front seat
(one left and one right).
Then pull the carpet out, to the rear and
open the carpet split around the front seats
brackets...
Other information:
Jeep Wrangler 2018-2025 Owners Manual: REFUELING THE VEHICLE — DIESEL ENGINE (IF EQUIPPED)
The fuel filler cap is located on the driver's side of the vehicle. If the fuel filler cap is lost or damaged, be sure the replacement cap is the correct one for this vehicle. Fuel Filler Door Fuel and Diesel Exhaust Fluid (DEF) Fill Location Diesel Fuel Filler DEF Filler NOTE: When the fuel nozzle “clicks” or shuts off, the fuel tank is full...
Jeep Wrangler 2018-2025 Owners Manual: Diesel Fuel Specifications
This diesel engine has been developed to take advantage of the high energy content and generally lower cost No. 2 Ultra Low Sulfur diesel fuel or No. 2 Ultra Low Sulfur climatized diesel fuels. NOTE: If you accidentally fill the fuel tank with gasoline on your diesel vehicle, do not start the engine...
Copyright © 2025 www.jewrangler.com

